April 2020
Alright, after 4 months of not posting anything in my blog (I was quite busy, fortunately), there’s obviously no excuse anymore for slacking on new posts, since the Corona Virus keeps most of us indoors (big shout out to all the people who keep this world running and especially care for the sick ones!).
In these times I reminded myself that I have quite enough space at home to set up a home studio. And to let the world know that I shot a little promo video.
The Home Studio
Alright, after 4 months of not posting anything in my blog (I was quite busy, fortunately), there’s obviously no excuse anymore for slacking on new posts, since the Corona Virus keeps most of us indoors (big shout out to all the people who keep this world running and especially care for the sick ones!).
In these times I reminded myself that I have quite enough space at home to set up a home studio. And to let the world know that I shot a little promo video.
So since this was a free project, I wanted to challenge myself with certain things:
I’m quite pleased with the result and I thought I’ll give you a depper insight into all these points. Let’s begin:
- Keep things fast pace and interesting
- Use as many different recording techniques as possible
- Shoot the whole thing as efficiently
- Try new things I have never done before
- Make it (a bit) fun
- Add a special twist
I’m quite pleased with the result and I thought I’ll give you a depper insight into all these points. Let’s begin:
1. Keep things fast pace and interesting
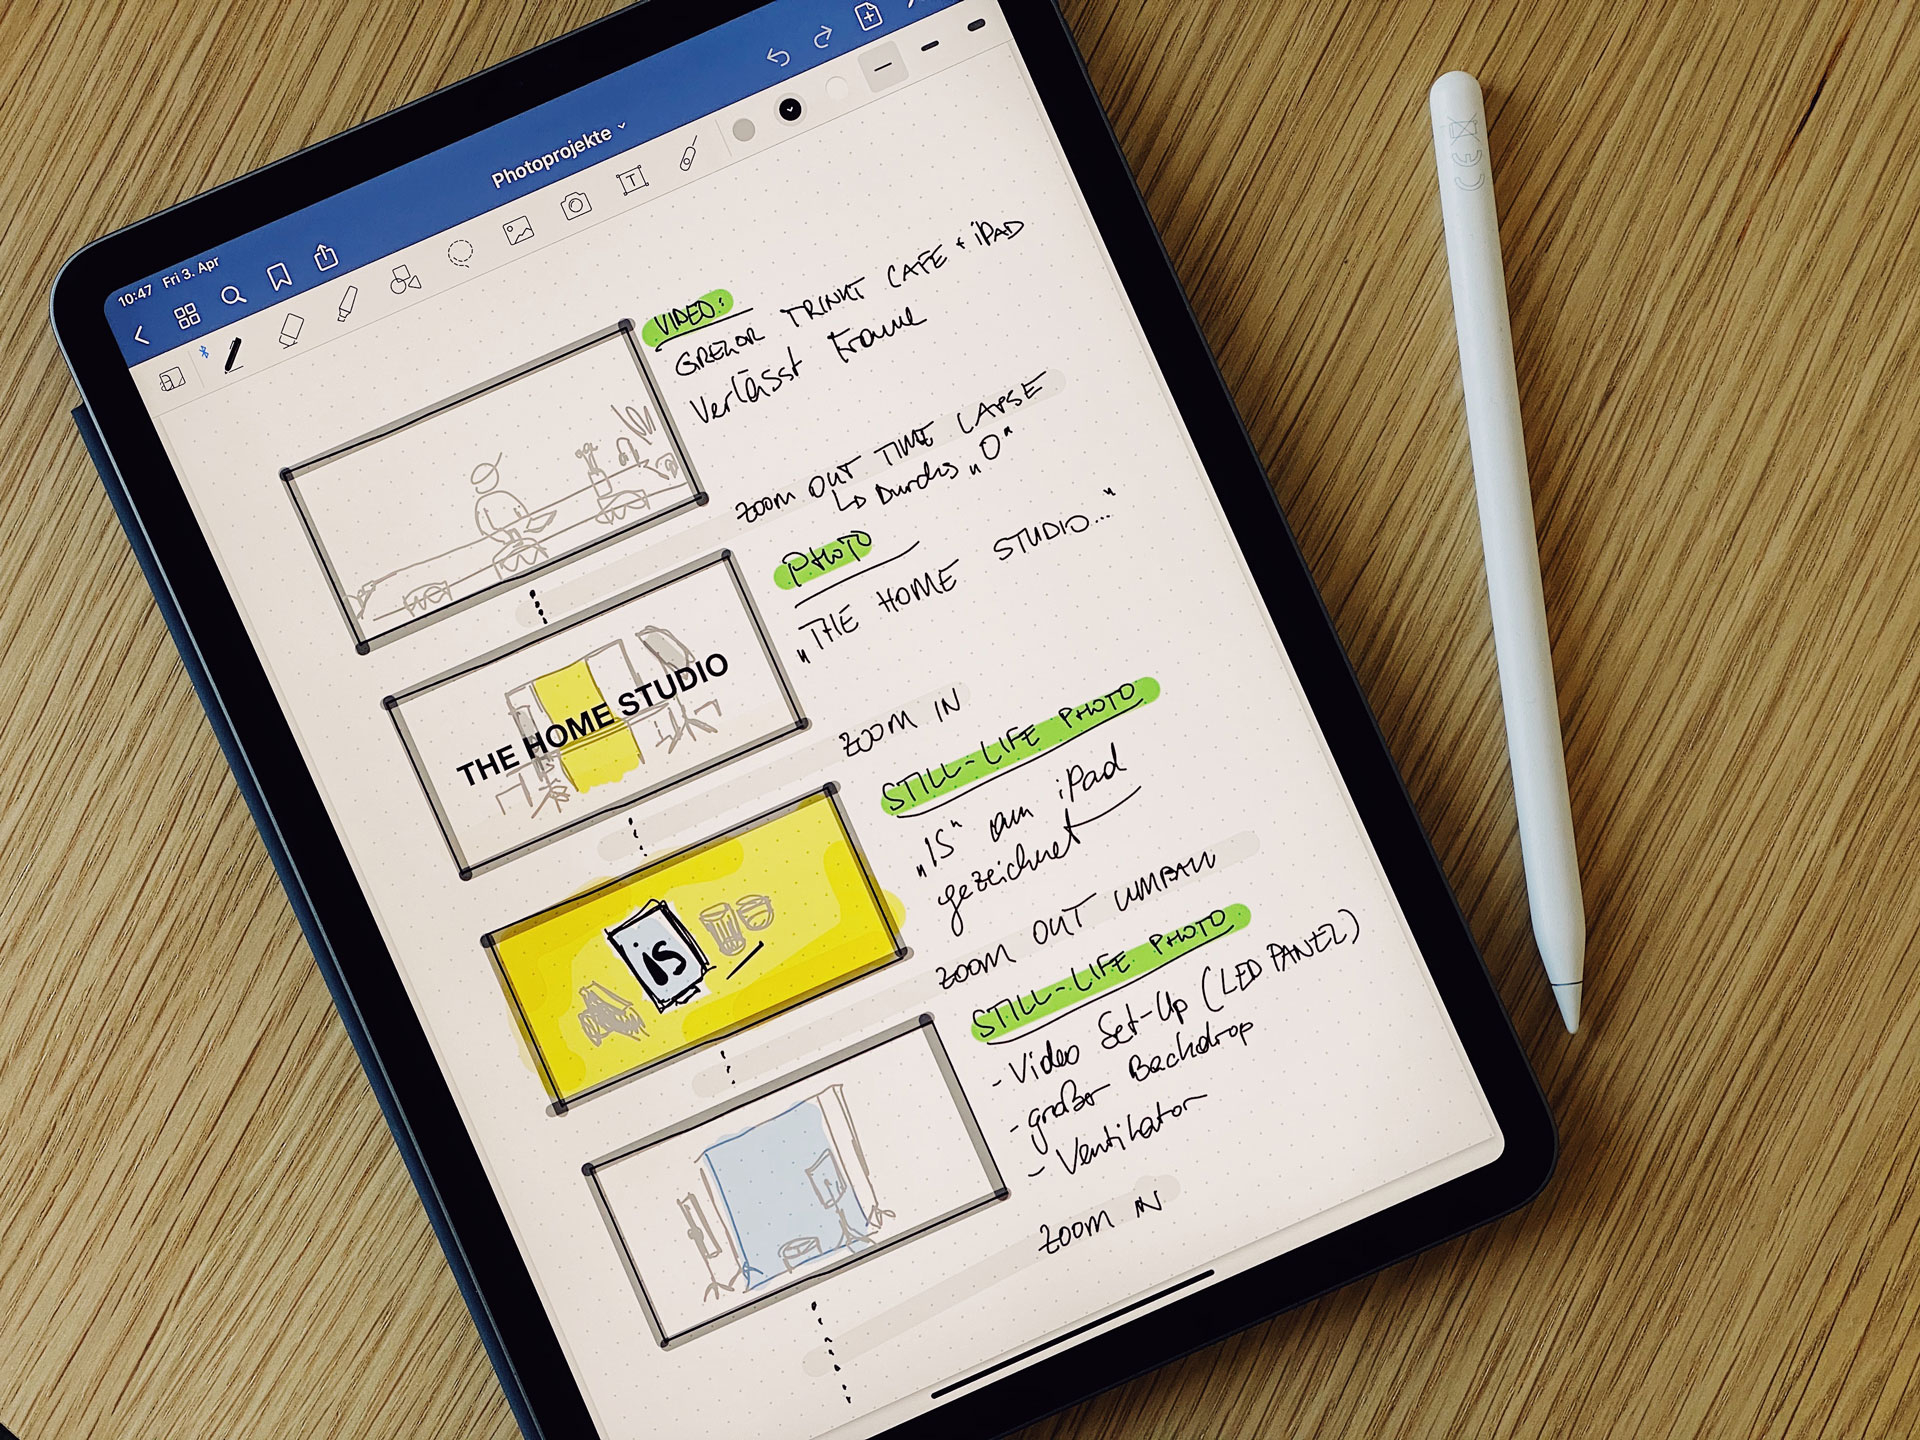
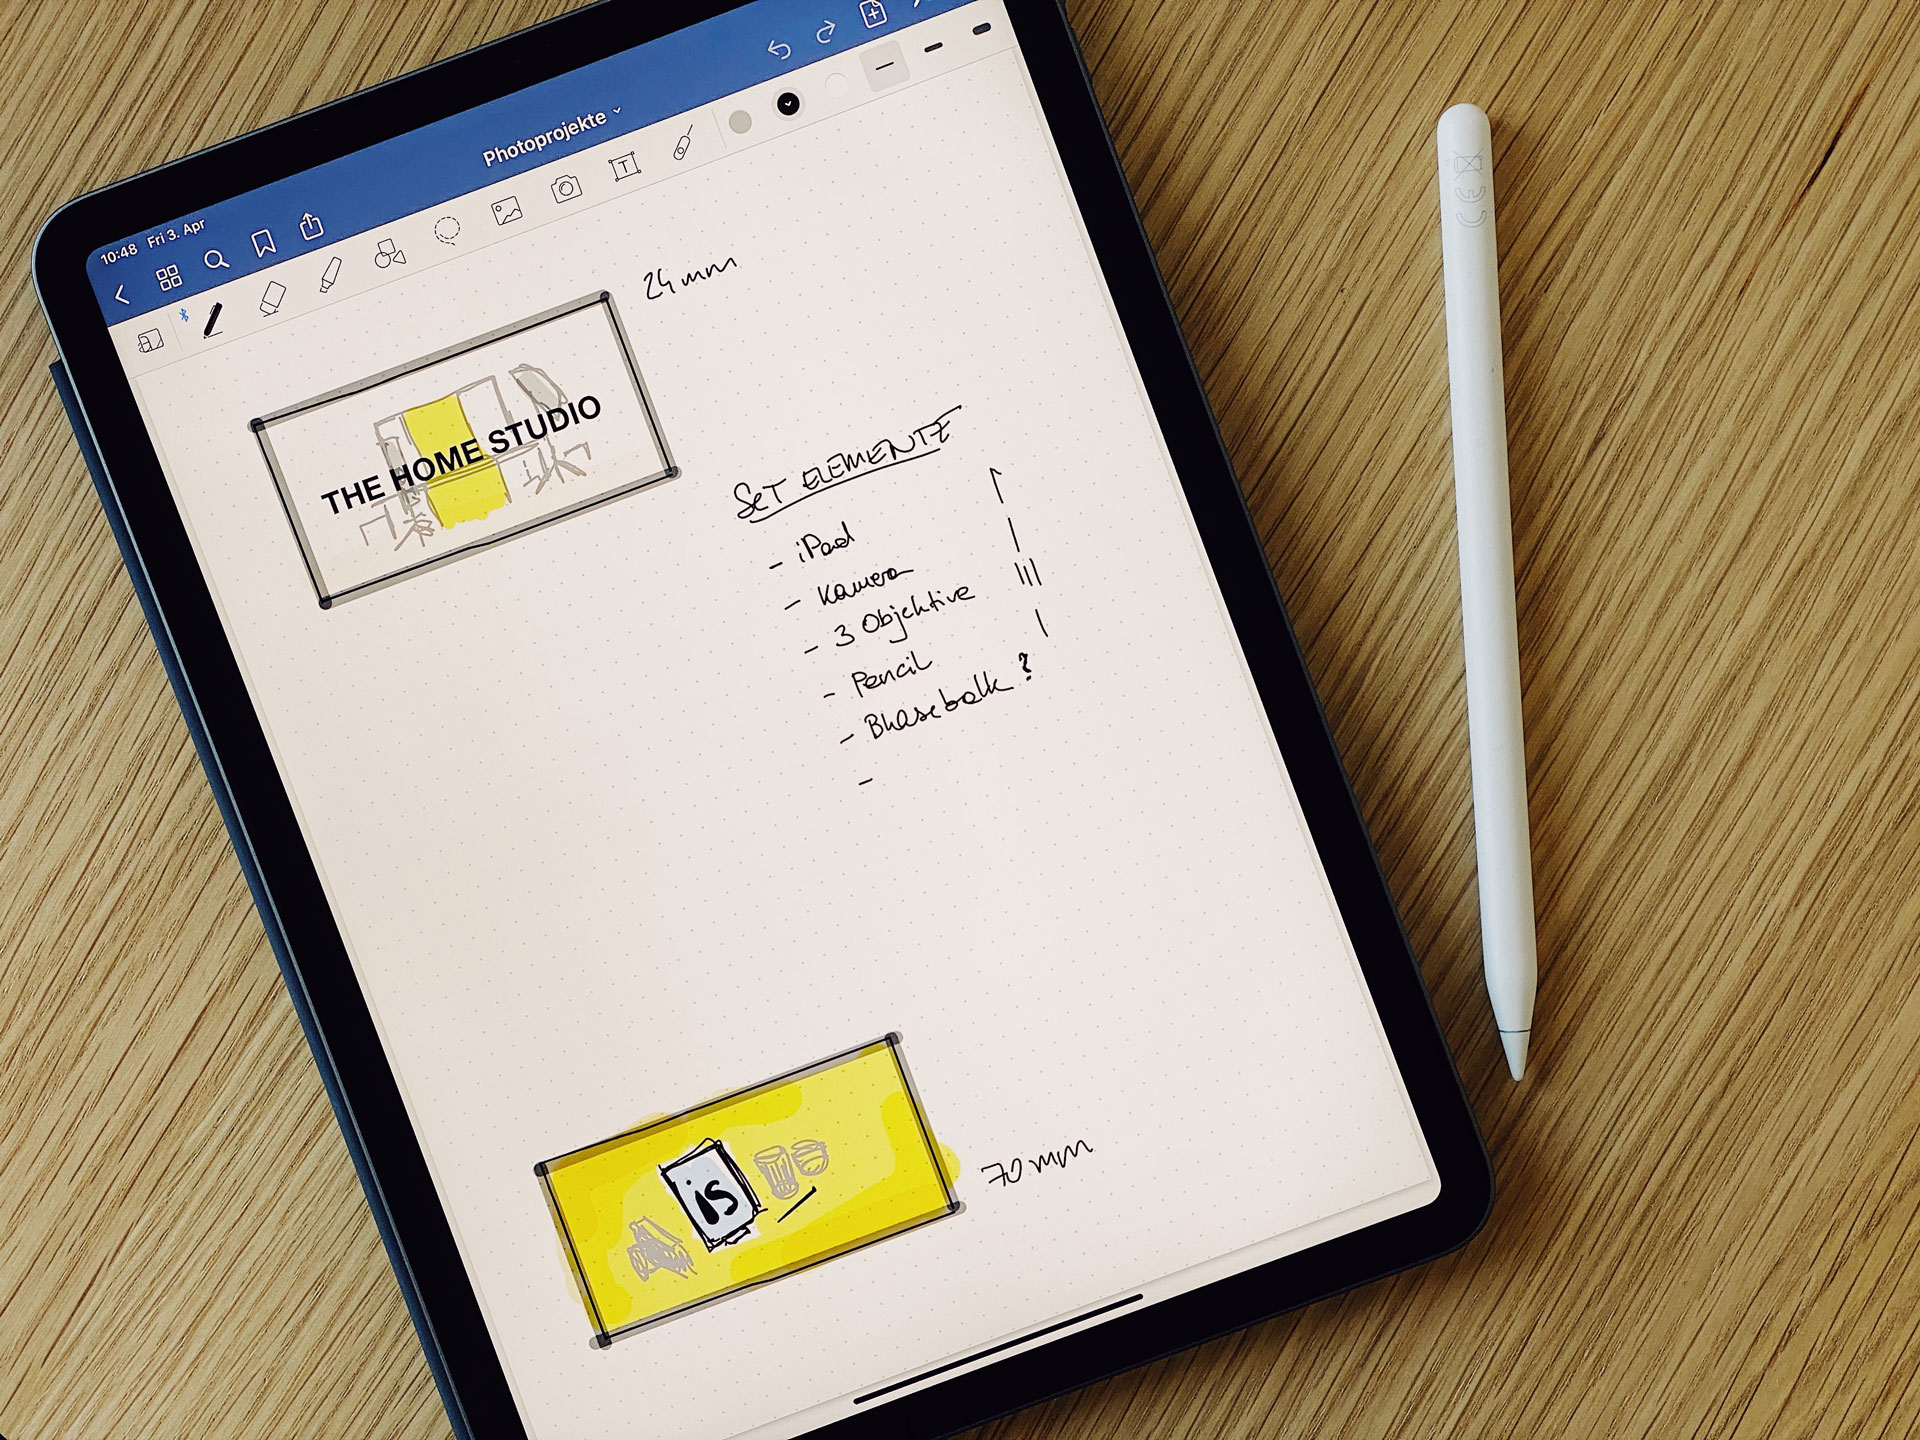
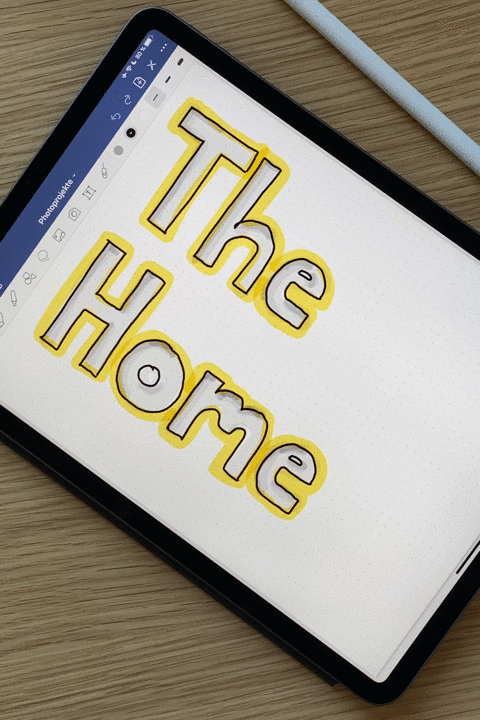
I knew I wanted to bring a message across. Since things might run without music or people might skip the caption on posts, I figured I put a message visually into the video: “The Home Studio is up and running”.
I wanted to start the whole thing with a bit of a suspense moment but then head directly into the main message “The Home Studio” (in case people jump off there, they at least got the message that there is a home studio within the first 4 seconds). Everything after that is icing on the message-cake and treates the audience with unexpected reveals and transitions.
I have to shout out to Peter Oswald here, a friend of mine woring in social media marketing and he convinced me to tighten that beginning as much as possible since attention spans these days are horribly short.
2. Use as many different recording techniques as possible
I made use of my camera(s) in various ways for this: I shot stills for my manual time lapse transitions, I shot timelapses with the timelapse function of the newest Sony firmware available, I shot slow motion video and I shot regular video. I basically used all the recoding functions there are on the Sony a7RIII.
Fun fact – the slow motion bit with the flying confetti was actually my backup-footage that I shot with the iPhone 11 Pro. Seriously, that 240fps slowmo feature when lit properly is damn good. The Sony a7RIII I used for the rest only does 120fps and I had better control for the time ramp I did in post using the 240fps footag from my iPhone.
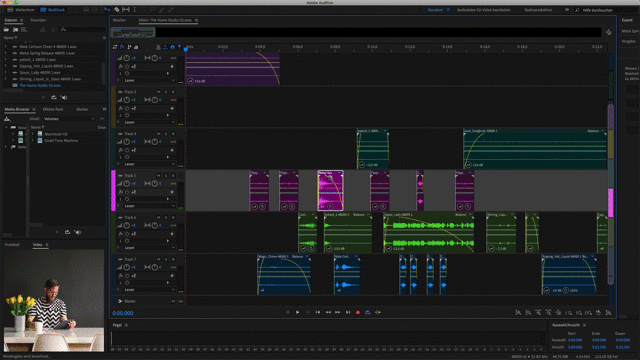
Ending up with a lot of different footage types was a bit of a challenge for the post production. The aspect ratios and resolution of video and stills were obviously different and so were the colors. In the end I think I spent most time in post harmonizing the look between all the different footage-types.
3. Shoot the whole thing efficiently
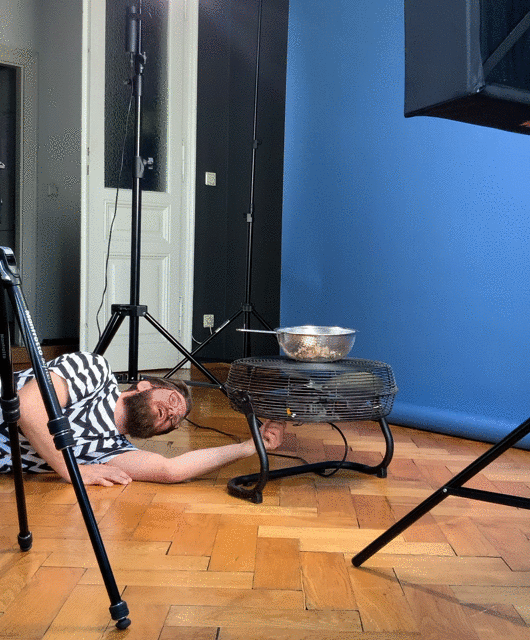
The old rule in film making is that rarely you are shooting scenes in the sequence as they happen in the final edit. For this video I had to figure out the best starting point in the video to set up my sets in an efficient way. There was quite some building happening: moving the table, changing backdrops, setting up lights, etc. And since I needed the change between sets to be visible in the timelapse transitions I was planning those scenes thoroughly. I ended up starting to shoot the slow-motion confetti scene first. It was the most tricky one for set-up and a good starting point for the rest (which I ended up shooting in sequence).
4. Try new things I have never done before
I wanted to add sound to this movie. I feel very comfortable editing music for soundtracks. But I never did actual sound design. To keep things efficient I figured I skip doing my own foley sounds and resorted to two great sources:
1) the free sound library from youtube – yes it exists and it is great (for most things)
2) an affordable stock audio website I like to use
I looked for suitable sounds for the transitions and explosions for quite a while. I was finally happy with them and then realized that the scene where I was drinking coffee looked wierd without hearing me doing so. So I added all the cup noises and my slurping in post using stock foley sounds.
5. Make it (a bit) fun
Looking for the foley sounds for the video I realized I can actually ad a fun twist to it. I ended up using cartoon-ish sound-effects and that also gave me the idea to keep the typography for the message a bit quirky. So I decided to actually hand-draw the letter.
I didn’t want to take myself too seriously with this video anyway, so the hand lettering, the comical sound effects and the cheesy studio “photoshooting house music soundtrack” blended nicely together.
6. Add a special twist
Funny enough, this last point was the first set idea I had for this video. I wanted it to run as a loop. Knowing I wanted to post this mainly on instagram and facebook I took into account that video on these platforms are looped if not manually stopped. Deciding on this was essential for the entire production process. I planned my scenes for shooting accordingly and picked the right music to make the edit work. I wanted to the loop to be perfect but not immediately obvious. I think with the coffee-drinking sceneI managed to hide it very well and maybe surprised some people with the restart of the whole video withouth knowing that it was looped.
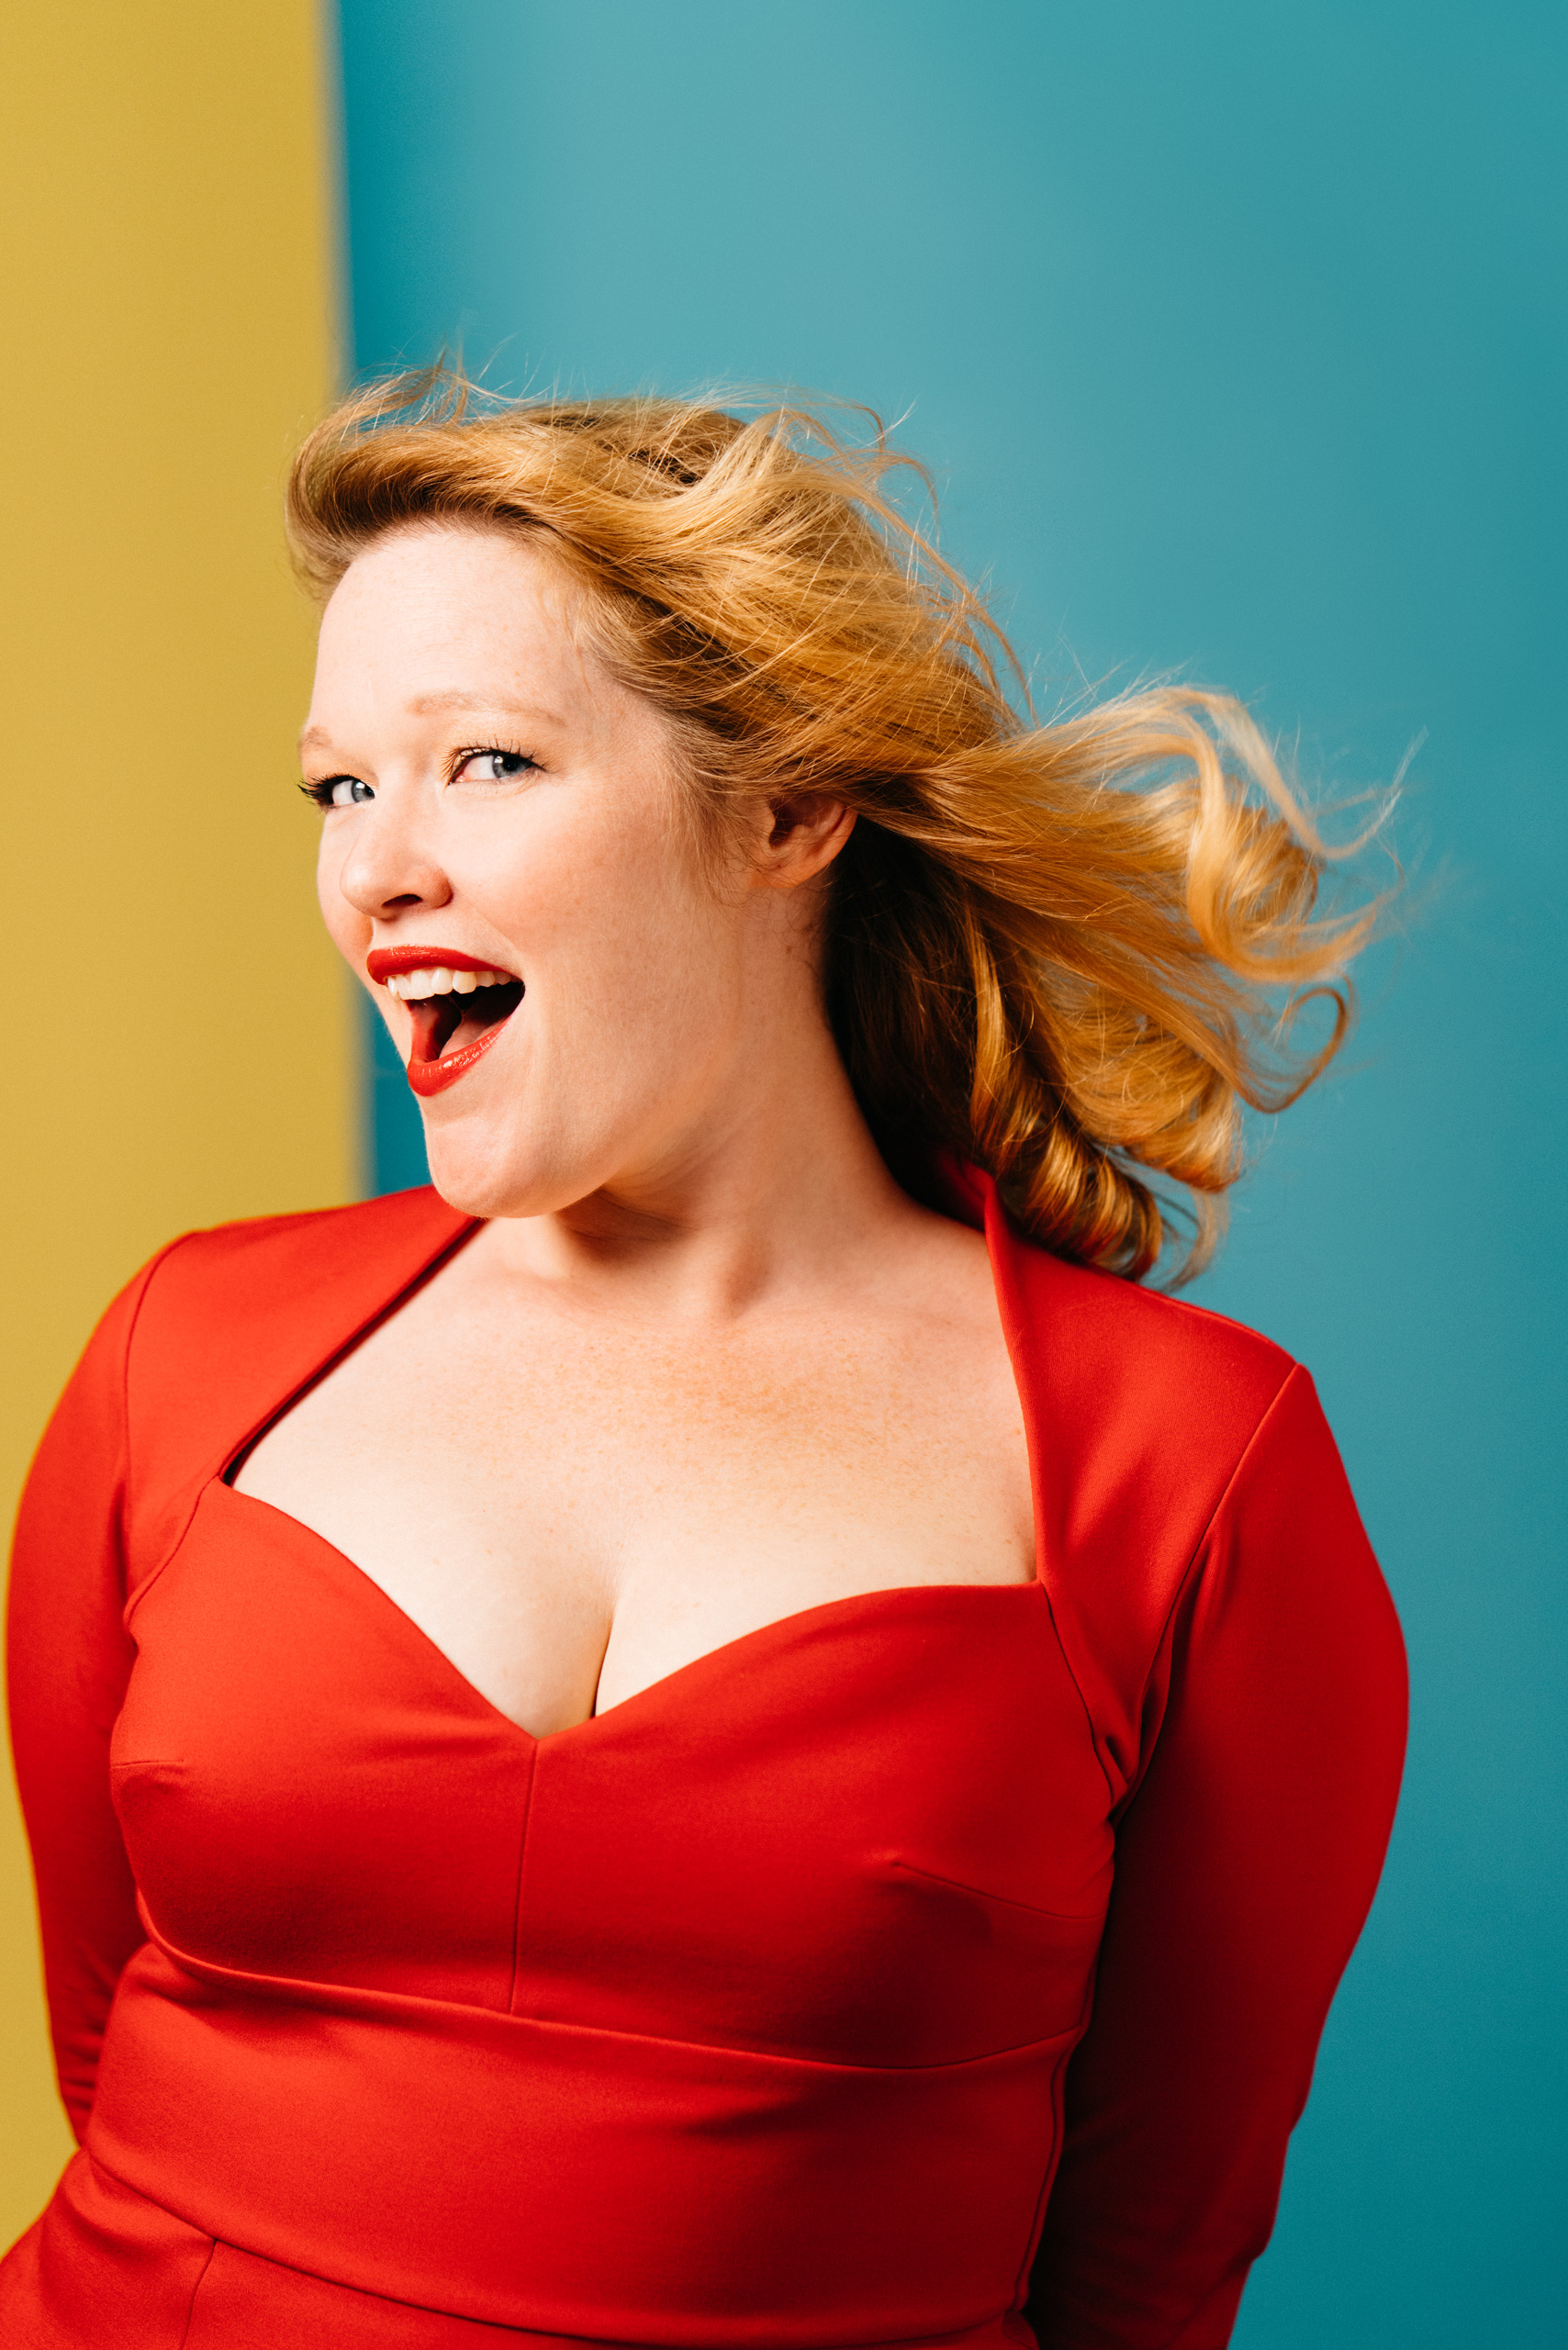
So why was I doing this? Well first of all I had the time and secondly in this weird Corona-Virus-Driven time I wanted to remind my audience that not all photoshoots have to happen outside, with people present. I did some fun things in my home studio before, like the photos for Just, almost all the shots for the “Einkochbuch” cook book (see making of here), some product shots as well as plenty of portaits.
So – ring me up, because: The Home Studio is up and running!
So – ring me up, because: The Home Studio is up and running!


Have you seen the other monthly updates? Check out the archive!